
Install and configure WebDAV in Windows IIS
In this tutorial, we will learn how to install WebDAV i.e. World Wide Web Distributed Authoring and Versioning service in windows server and configure the same in IIS. WebDAV is basically used for sharing documents and enabling remote groups to work together. Here we use WebDAV to share Microsoft Outlook Calendar between two different systems or remote systems.
If your server or system is installed and configured with IIS/WebDAV then you can skip this tutorial to share Outlook Calendar. If not then follow the below steps to install and configure WebDAV.
Step 1. Install IIS Roles roles to your server/system.
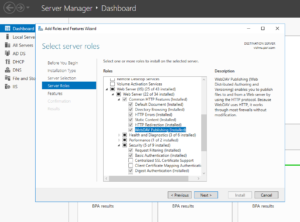
Step 2. Select WebDAV Publishing from Common HTTP Features of Web Server (IIS) in Server Roles. Also, select the necessary Web Server services you required.
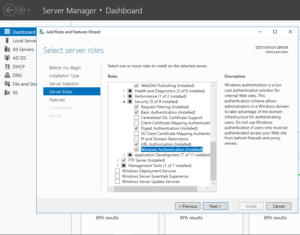
Step 3. Select Basic Authentication, URL Authentication, and Windows Authentication from the Security feature of Web Server Service and click Next.
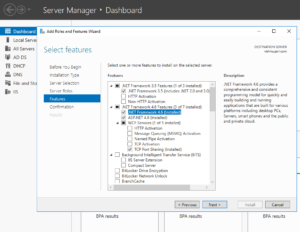
Step 4. Select necessary .Net Frameworks features from features section as per your server configuration and requirements. Here we have selected .Net Framework 3.5, 4.6 and ASP.Net 4.6.
Step 5. Click on the Next button to install IIS and WebDAV services in your server. The installation of IIS and WebDAV services completed in our server and we need to configure the same in IIS server. To Configure the WebDAV in IIS, we need to follow the steps given below.
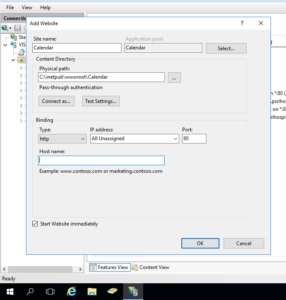
Step 6. Add a New Website in IIS Server and give the site name as per your wish. Here we have used the site name as Calendar and Physical path as C:\inetpub\wwwroot\Calendar. Specify the IP address and port to access the server remotely. In our case, we use IP 192.168.200.9 and port Number 8085 to access the server.
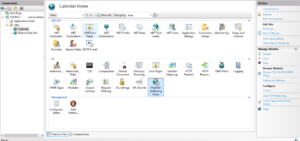
Step 7. Click and select the Calendar Site or the site name you have specified and double on WebDAV Authoring Rules to enable WebDAV. Enable WebDAV from the right panel.
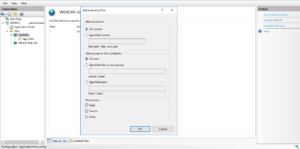
Step 8. Click on Add Authoring Rules in the right panel and select All Content from Allow Access to section, All Users from Allow access to this content to section, Read, Source and Write from Permissions section.
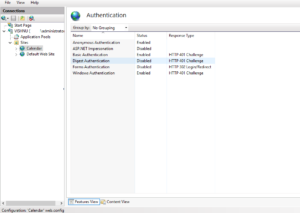
Step 9. Click on the Authentication option of the site (Calendar) and enable Anonymous Authentication, Basic Authentication, and Windows Authentication.
Now the installation and configuration of WebDAV completed and we need to connect our Microsoft Outlook calendar with WebDAV to share the same calendar with other systems.
The sharing of Outlook Calendar with WebDAV is given in the next session.
Leave a Reply